 |
|
| Home | Documentation | Writing Weblications ... Contact |
Let's try writing a weblication in another location, Console. The Console location uses the other kind of location architecture: it just employs a JavaScript interpreter and leaves the UI implementation up to you. We'll use the Glade and GTK extensions to provide a graphical interface on top of Console. Glade is a graphical UI design program, and GTK is the underlying toolkit that allows us to maniuplate graphical components individually.
Glade is an excellent open source graphical UI design program. SashXB's use of Glade allows weblication writers to create GUIs quickly by dragging and dropping desired elements into containers. The following short tutorial shows how to create the same weblication with a Glade GUI instead of an HTML GUI. For this simple example the benefits of Glade may not be apparent, but take a look at SashFTP for a good example of a complex Glade GUI.This weblication runs in a Console location. It uses a Glade GUI, so the weblication will rely on the Glade extension. We're going to modify individual GTK widgets as well, so we must include the GTK extension too.
Create a directory to hold your weblication files.
We start by creating the Glade GUI file. The interface will be the same, but instead of the WinApp status bar that appears at the bottom of the weblication, we'll add a row for some text.
Start Glade.
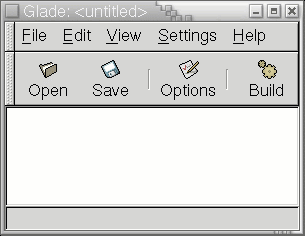
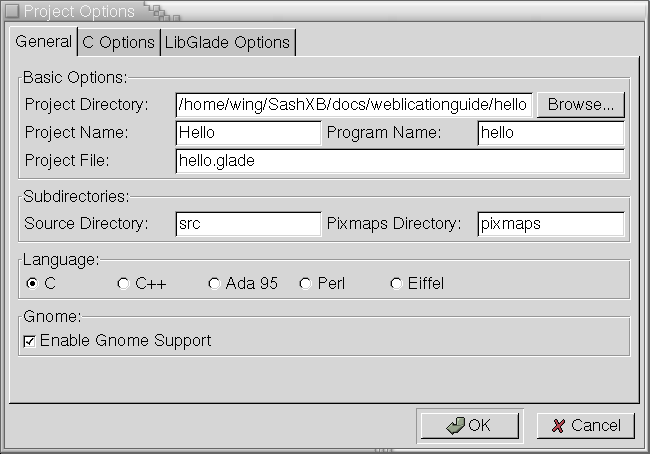
In the main Glade window (the one with open/save), click the 'save' button - fill in appropriate appropriate directory so that the .glade file gets saved to the correct location, name the glade project (we'll call this project 'hello')
The main window.
The save window.
In the Glade palette window (the one with all the different UI elements), click on 'window'. This will create a new window, which will pop up. The properties window will display the new window's attributes. Rename both the Name and Title to 'Hello'.
The palette window.
In order to create two rows, we switch back to the palette and click on 'vertical box' - the one with the three horizontal rows. Click somewhere on the 'Hello' window, and a dialogue box prompting for the number of rows will pop up. NOTE: typing '2' into the text area will NOT create two rows. You need to click the down arrow button to decrease the number of rows.
Since the top row will have two elements, divide it into two elements. In the palette, click the 'horizontal box' button and create 2 columns. Again, to create 2 (and not 3) columns, you need to click on the down arrow.
In the palette, click the 'text entry' button, then click on the upper left cell of the 'Hello' window. Rename the 'text entry' element to something appropriate, like 'username'.
In the palette, click the 'button' button, then click on the upper right cell of the 'Hello' window. Rename the 'button' element to something appropriate, like 'ok'. Change the label to 'OK'. We need to associate the button with some JavaScript function, so we click on the 'Signals' tab for the button. Click on the button with three dots to the right of the 'Signals:' label, and select click. In the 'Handler:' area it will say 'on_ok_clicked'. Be sure to add the signal by clicking on the 'Add' button at the bottom of the window. When 'clicked' and 'on_ok_clicked' appear in the signal list, everything is set: when the user clicks on the OK button, your
In the palette, click the 'label' button, then click on the bottom row of the 'Hello' window. Rename the 'label' element to something approriate, like 'response'. For now, set the label as 'Hello'.
Don't forget to save your Glade file before quitting.
The finished product:
Now we're ready to write the actual weblication code, which will be very simple. If the button is clicked, we read the name out of the username text entry element, create some string, and print it back out to the label element.
Use your favorite editor to write the JavaScript code.
Use the WDF editor to create a new WDF file for your weblication.
Every weblication must have its own GUID, so generate a new one by clicking 'Generate'.
Make sure that "weblication" is selected.
As with your WindowApp program, you need to list the Sash components that you use. Add the following dependencies: Console, Glade, GTK.
Click 'Save'.
Now run sash-install on the wdf file ('sash-install hello.wdf').
Call the runtime on the wdf file ('sash-runtime hello.wdf') to run the weblication.Creating a Glade GUI


on_okay_clicked JavaScript function will be invoked.

Writing the Sash Code
hello.js:

// Usually we'll assign variables to useful objects.
// The following are used to access elements in the glade GUI.

// The glade file that contains all of the GUI information.
// Since we're using the Console location, we have to explicitly
// tell the Glade extension what UI files to use.
var gladefile = new Sash.Glade.GladeFile("hello.glade");

// The text entry element that contains the name.
var nameWidget = gladefile.getWidget("username");

// The label element that contains text.
var responseWidget = gladefile.getWidget("response");

// The function that we associate with a button click.
function on_ok_clicked(){

    // Grab the text out of the username text entry field.
    var name = nameWidget.getText();

    // some default value.
    if (name == "") {
        name = "world";
    }

    // for debugging
    printsys("Saying hello to  " + name);

    // set the text in the label area.
    responseWidget.setText ("hello, " + greeting);
}
Creating a WDF File
General
Fill in the Title/Abstract/Author information.
Version
Ignore this for now.
Actions
Click 'New Action'. A new entry is added and highlighted. Click 'Choose' and pick the Console location. There is a registration area (with registration tags). Inside the tags, add the following so that the window reads as follows:
Again, make sure that the jsfile tags are on the same line.
<registration>
<jsfile>hello.js</jsfile>
</registration>
Dependencies
Files
You have two data files (your js file, and the glade UI file) and you need to add them here: hello.js and hello.glade.
Install
Ignore this for now.
Platforms
Select 'Linux'.
Wing Yung
Last modified: Tue Jun 11 14:47:40 EDT 2002